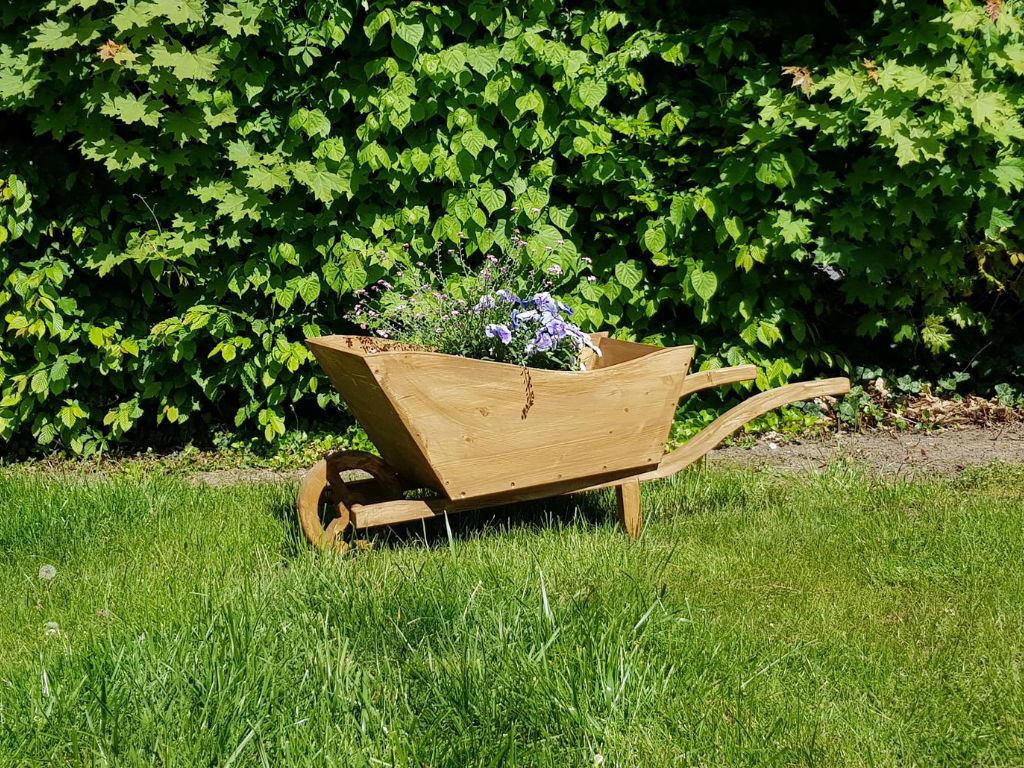
The plant wheelbarrow
That's how you build a creative flowerpot!
Whether you choose springtime flowers or colorful autumn flowers, with this individually plantable wheelbarrow you have a special eye-catcher in your garden for every season. Furthermore, you cannot only customize this wooden decoration article according to your own preferences, with just 30 € material costs it is also a cheap project and it makes a great gift for all flower lovers.
| Material | Tools |
|---|---|
| The tub: 5 boards: 80x40 cm | band saw |
| The wheel: 2 boards 40x40 cm | jigsaw |
| The rack with handle: 2 boards á 120x20x4 cm | multi sander |
| Round wood 30 cm long and 2 cm diameter | cordless screwdriver |
| Dowel 2x á 6 mm | angle |
| Glue | pencil |
Description:
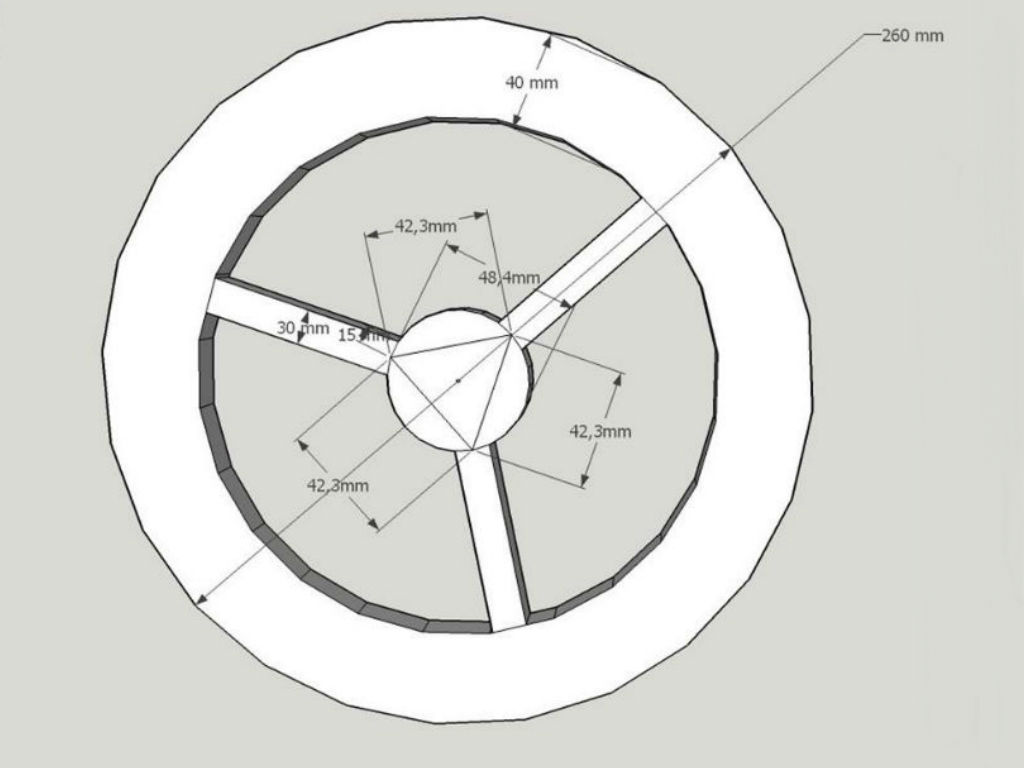
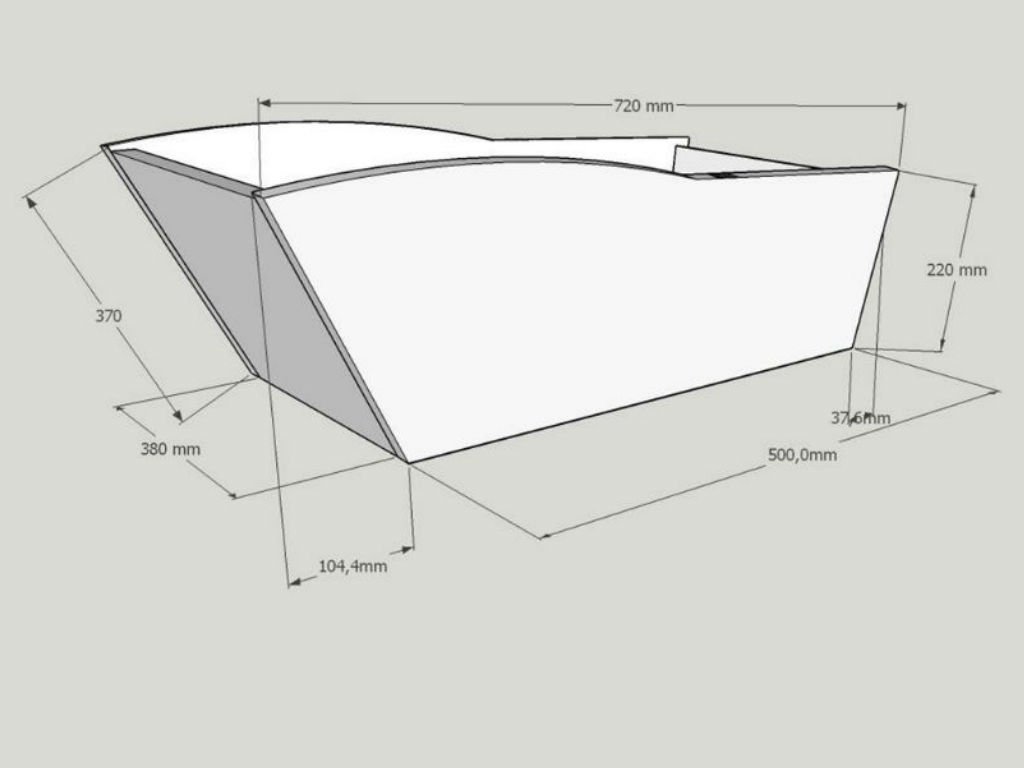
To get a first impression of the project as a whole I drew plans for the tub and wheel:
Step 1: Cutting the boards and curved side panels
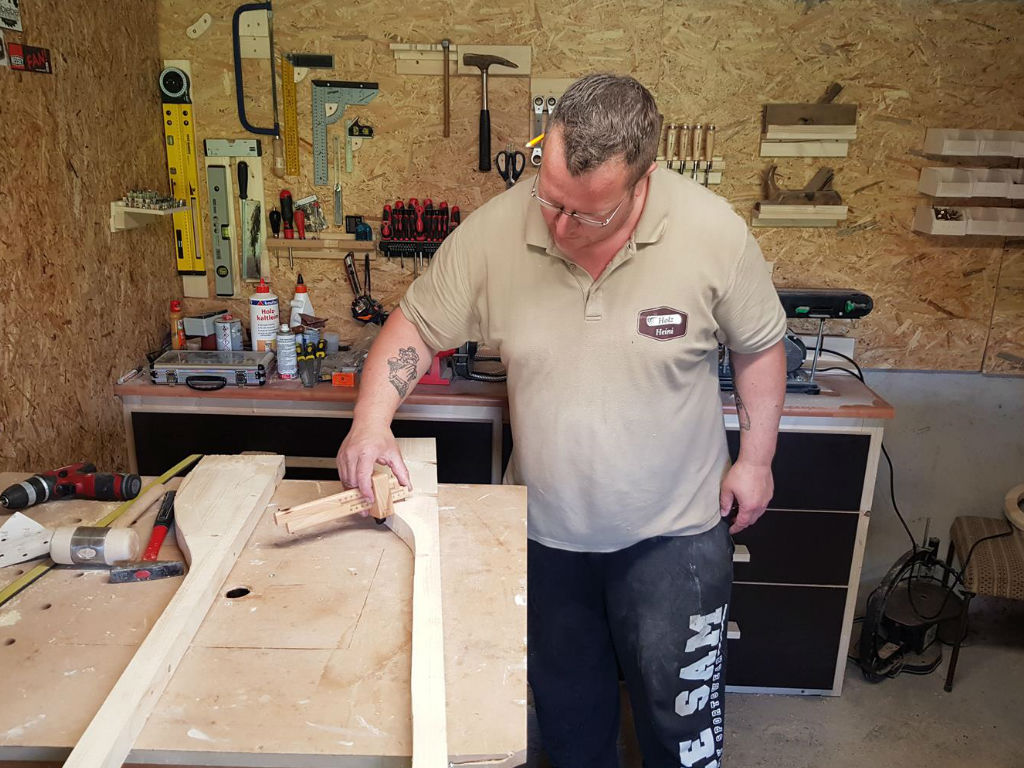
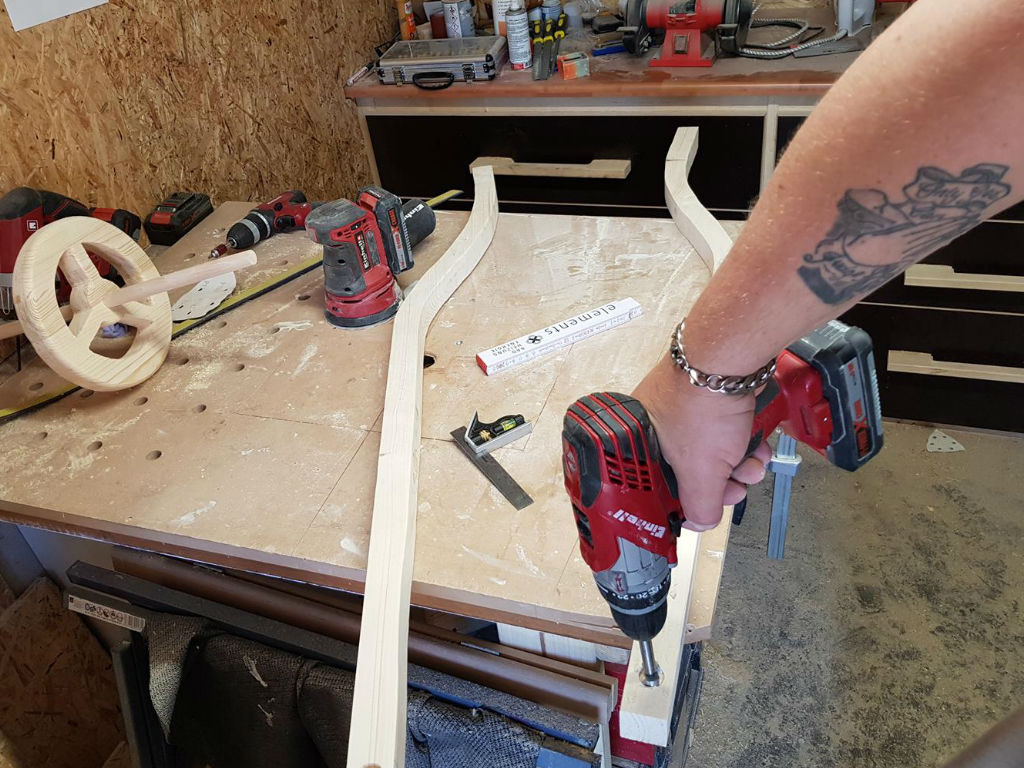
With the help of the dimensions from the plan, we can first saw the side parts and the bottom of the wheelbarrow’s tube into the desired shape. For the curved side panels, we hammer a small nail into the wood on both the left and the right hand side. These serve as a guide to define the curved shape of the side panels.
For this we now take the plastic strip or a similar flexible strip, hold it against the nails and draw a line. (Alternatively, the line can be drawn freehand and the nails can also be offset individually to obtain the desired curves.)
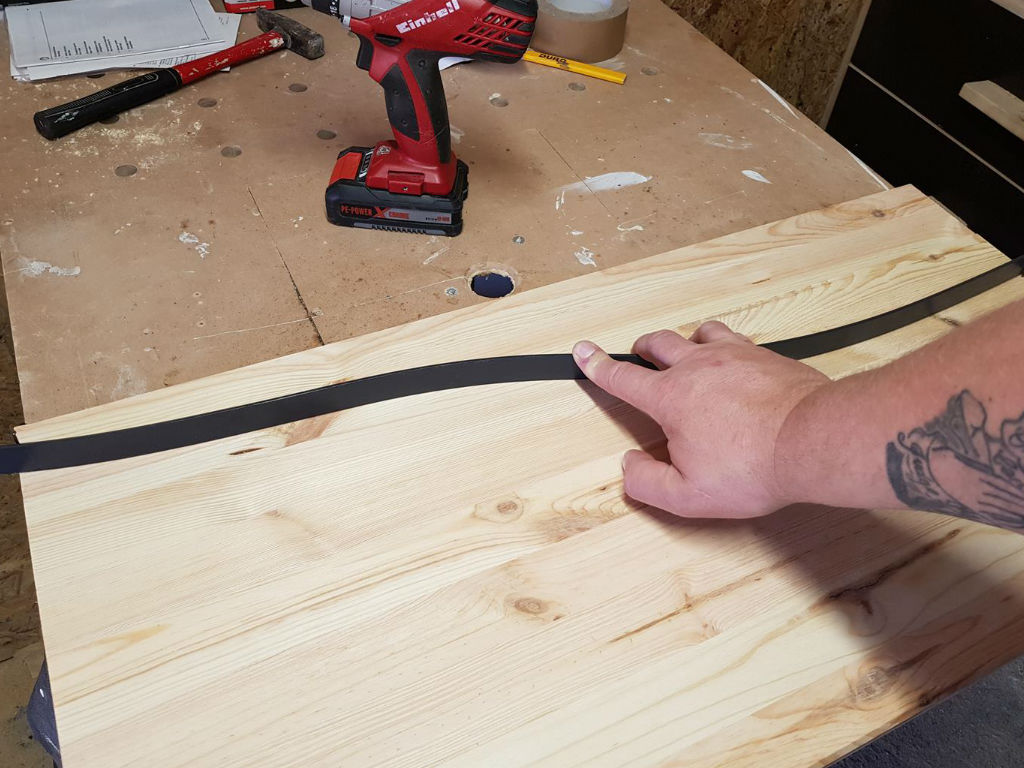
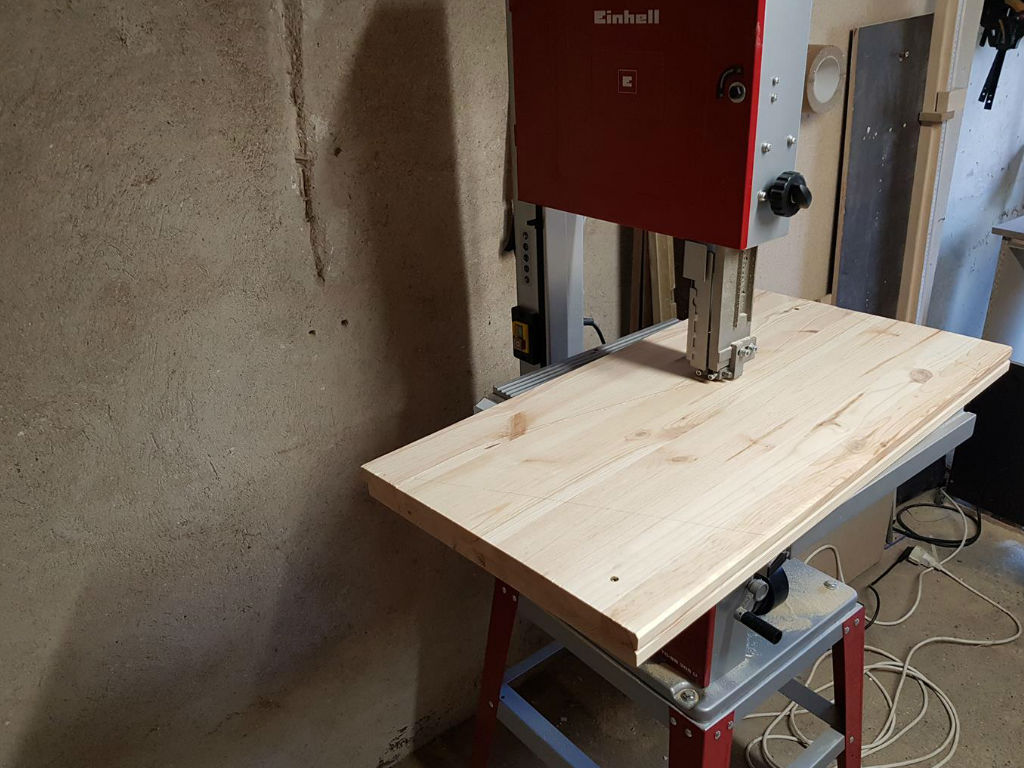
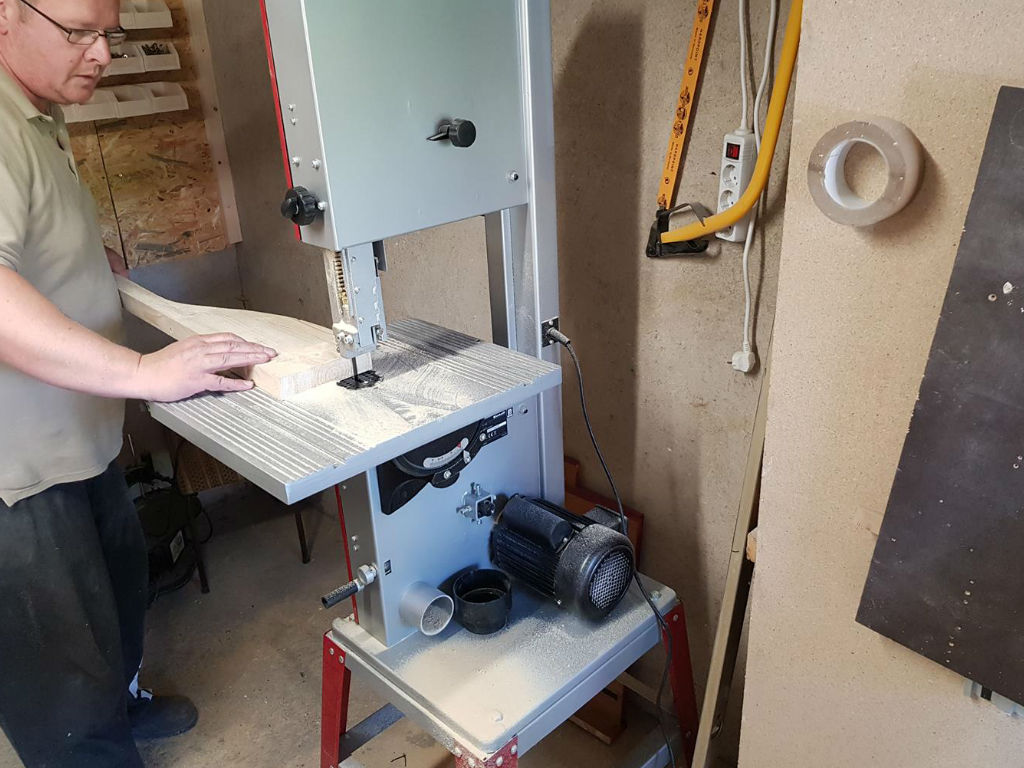
Then we draw the bevels, from bottom to top on both sides. Once the curved outlines are marked, they can then be sawed out with a band saw. The two bevels at the front of the side panel, can be cut as well.
Step 2: Bolting the side panels to the bottom plate
In the third step we place the bottom plate between the two side parts and mark the angle of the bevel edge on the lateral edge of the bottom plate. Then please cut the plate with a circular saw or band saw.
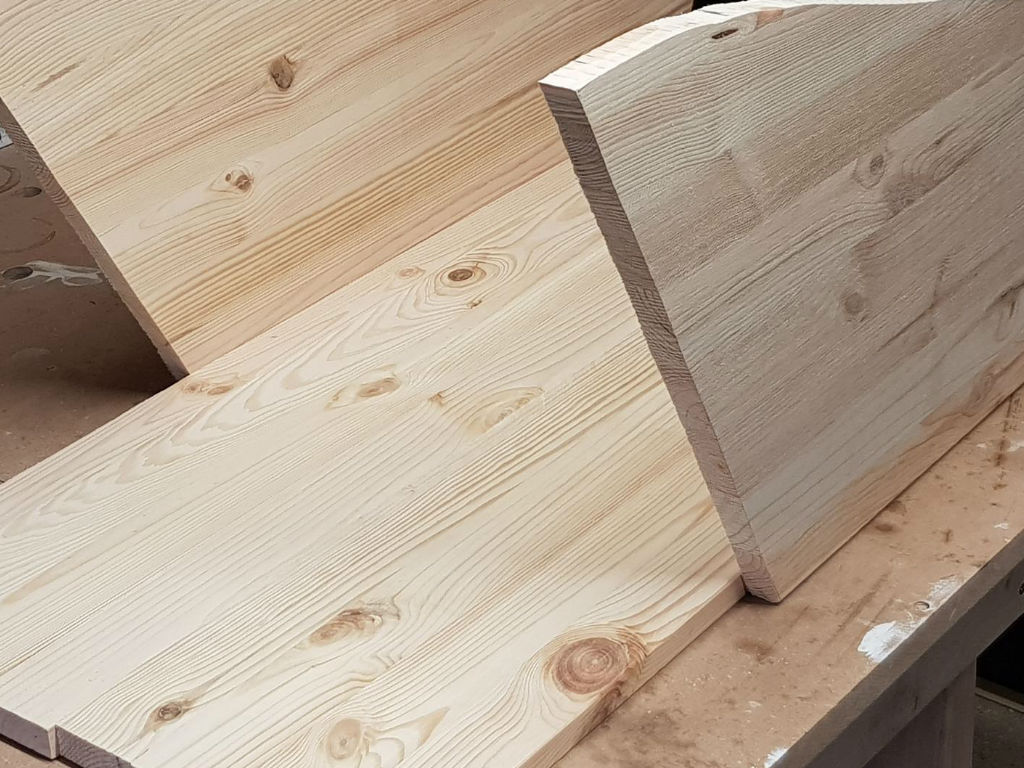

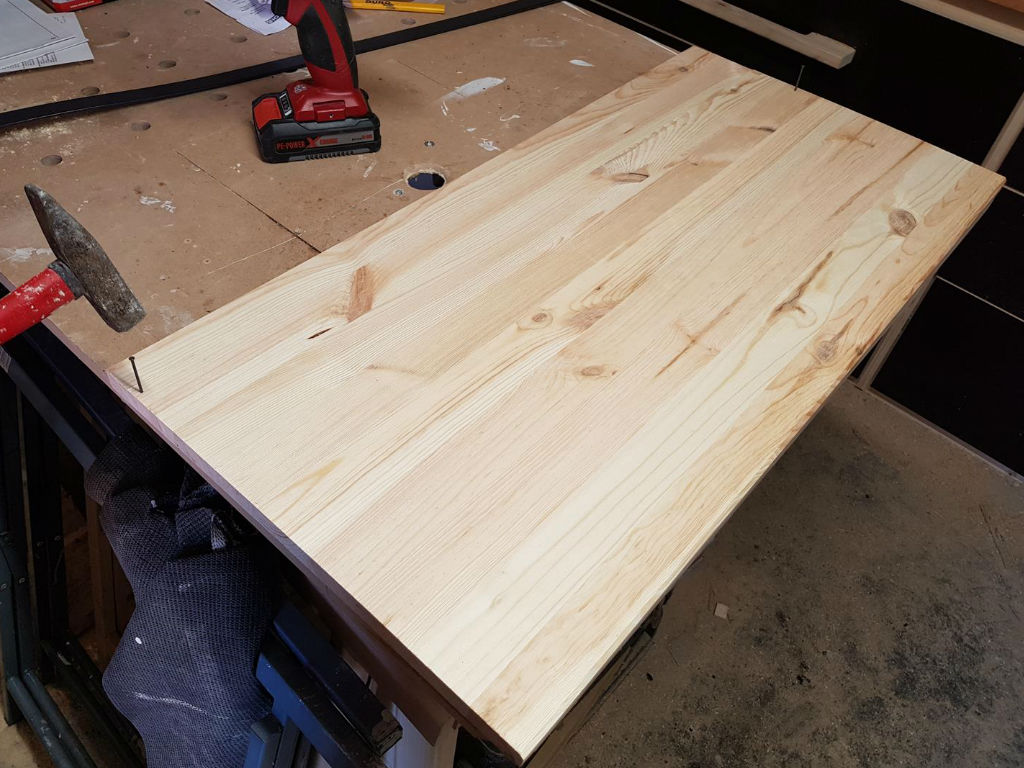
Now let's take the bottom plate and saw along left and right with the circular saw or band saw at 10 degrees, so that the side parts of the wheelbarrow are slightly inclined. Next, we take a 3mm drill and pre-drill the sidewalls. For that, we position the drill a bit diagonally as well. When the side parts are pre-drilled, we can screw them from the outside to the bottom panel. In order to increase the stability even further we add some glue to the joint faces before bolting the side panels to the left and right of the bottom.


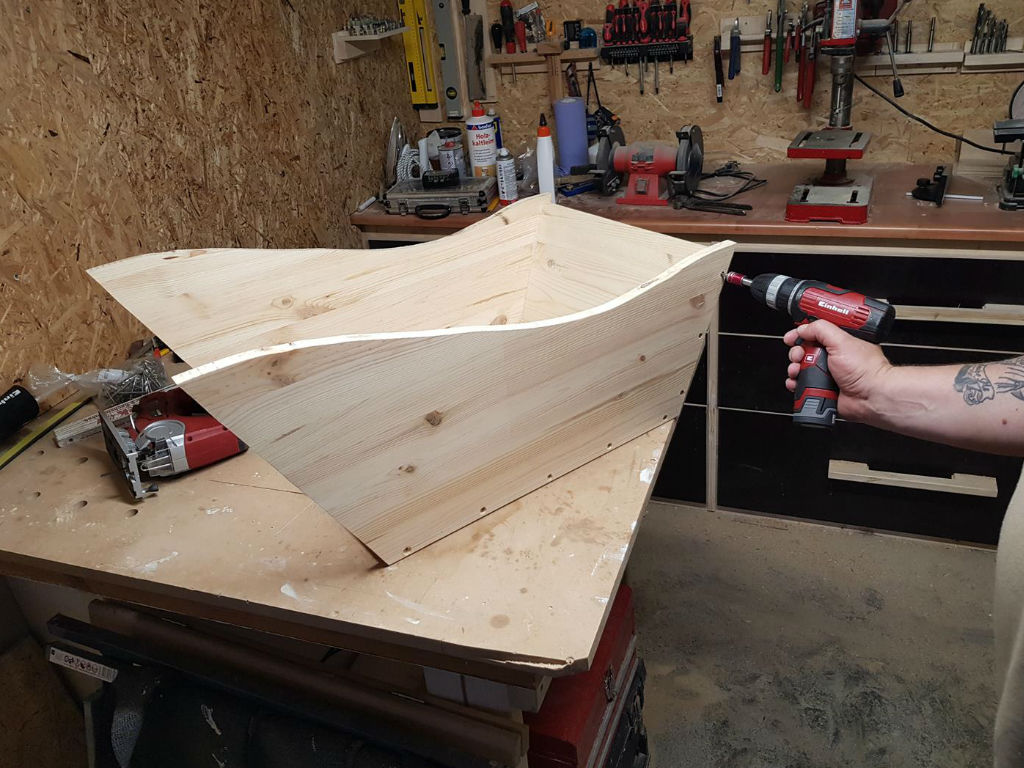
Step 3: Attaching the front and back panels
After attaching the side panels to the floor panel, we focus on the front wall and the rear wall of the wheelbarrow. First, we will draw their outlines on the intended panels. Since the front and back panels are placed between the side walls, we hold the board against the side walls and draw the reference line from the inside. Please mark the front side the same way. Since both are marked, we cut the boards to fit. Then the sides are placed in the wheelbarrow and fixed with a clamp.
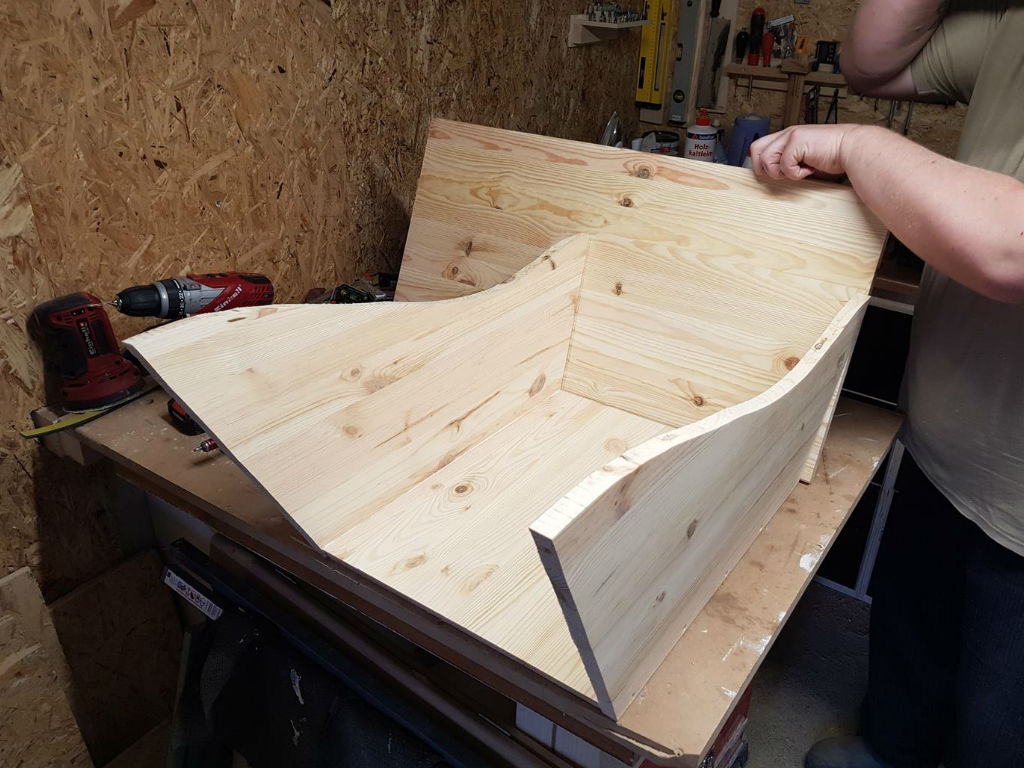
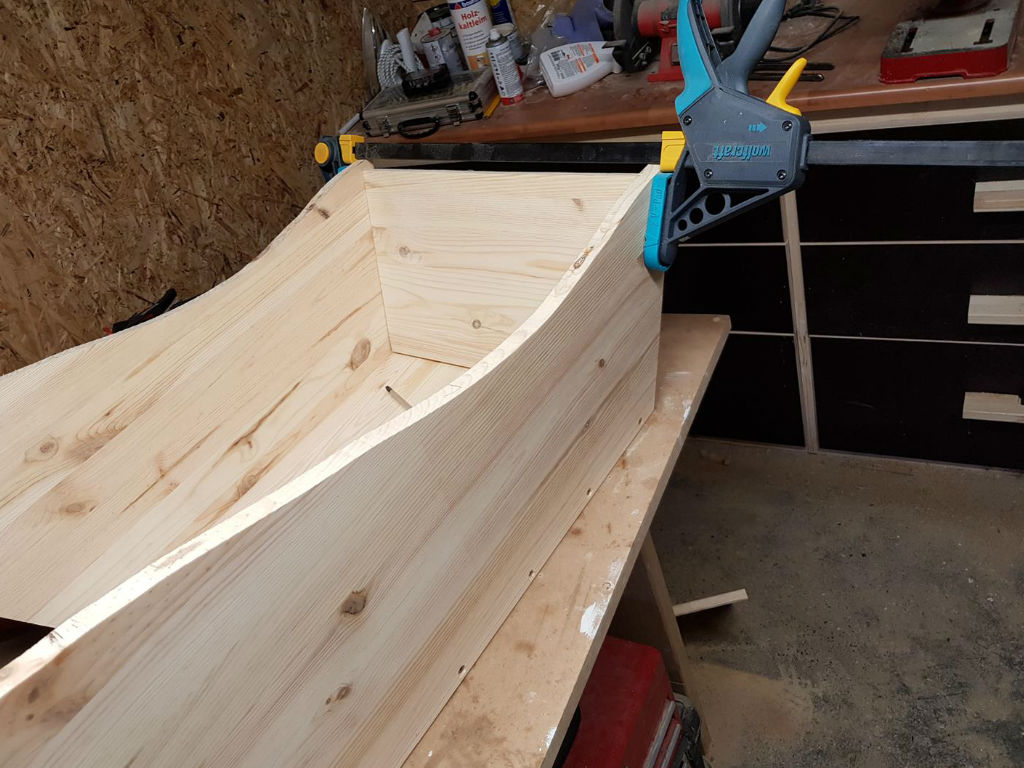
Again, we pre-drill everything and then screw both the front and rear wall to the side panels. Afterwards, we grind everything smooth with the orbital or multi-sander.
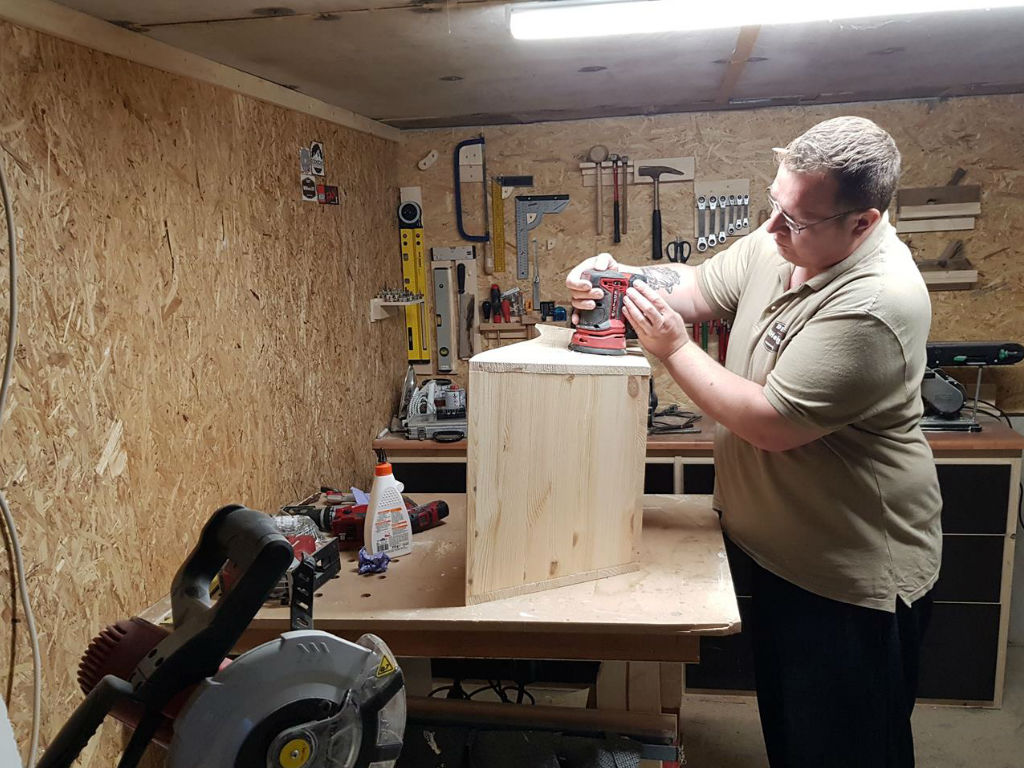
Step 4: Preparing the front wheel
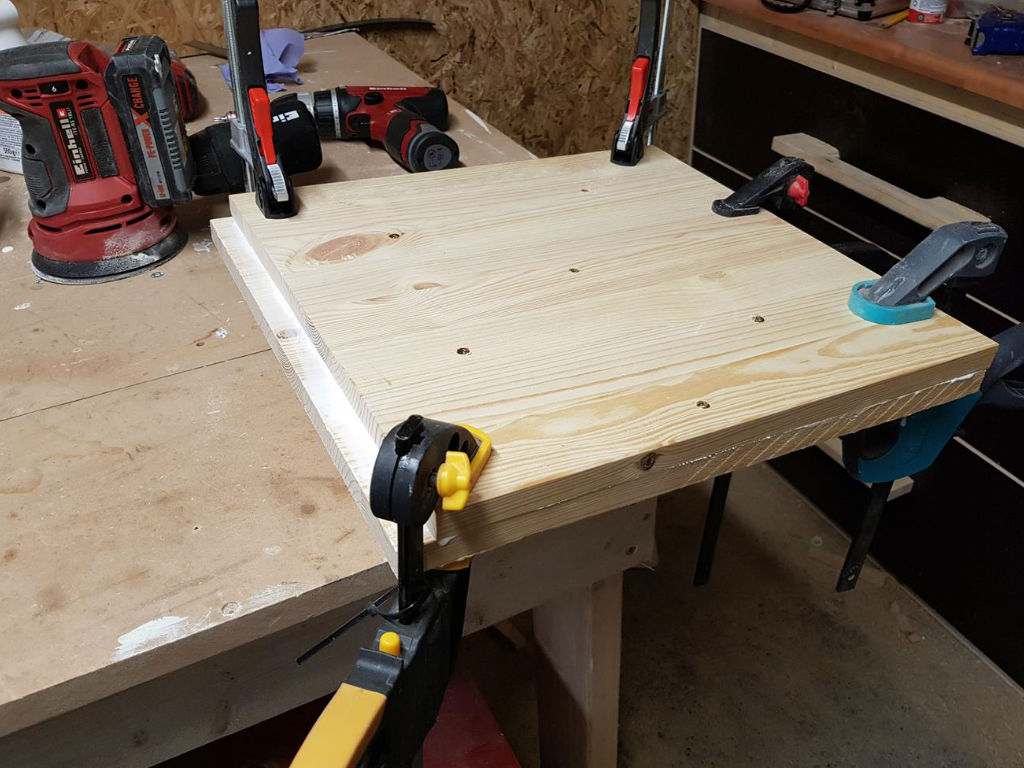
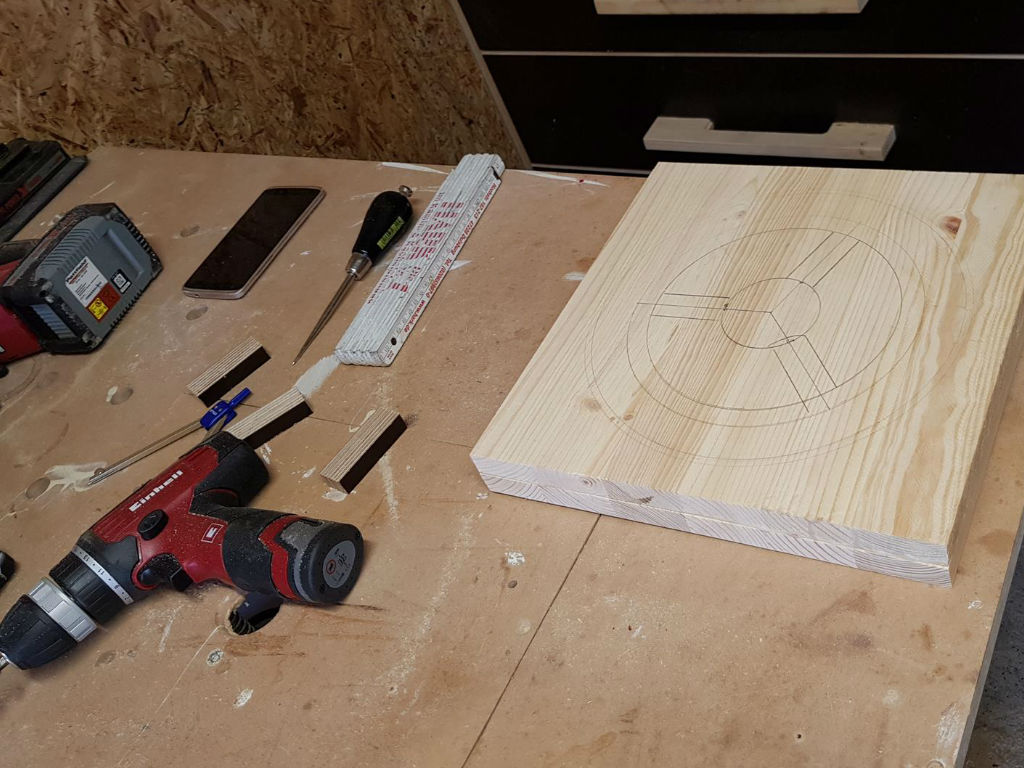
Now that the basic structure of the wheelbarrow is ready, we are preparing the front wheel. For this, we take two boards (40 x 40 cm) and glue them together: just apply a large amount of glue on the plates and press both together with the screw clamp. If you do not have such big screw clamps, just screw a few screws into the corners of the boards. After a few hours of drying, we can now saw the plate to about 30 cm * 30 cm. To find the center of the square, we draw in the diagonals. In order to draw the circle for the wheel, we use the measurements from the plan.
Step 5: Sawing and grinding the front wheel
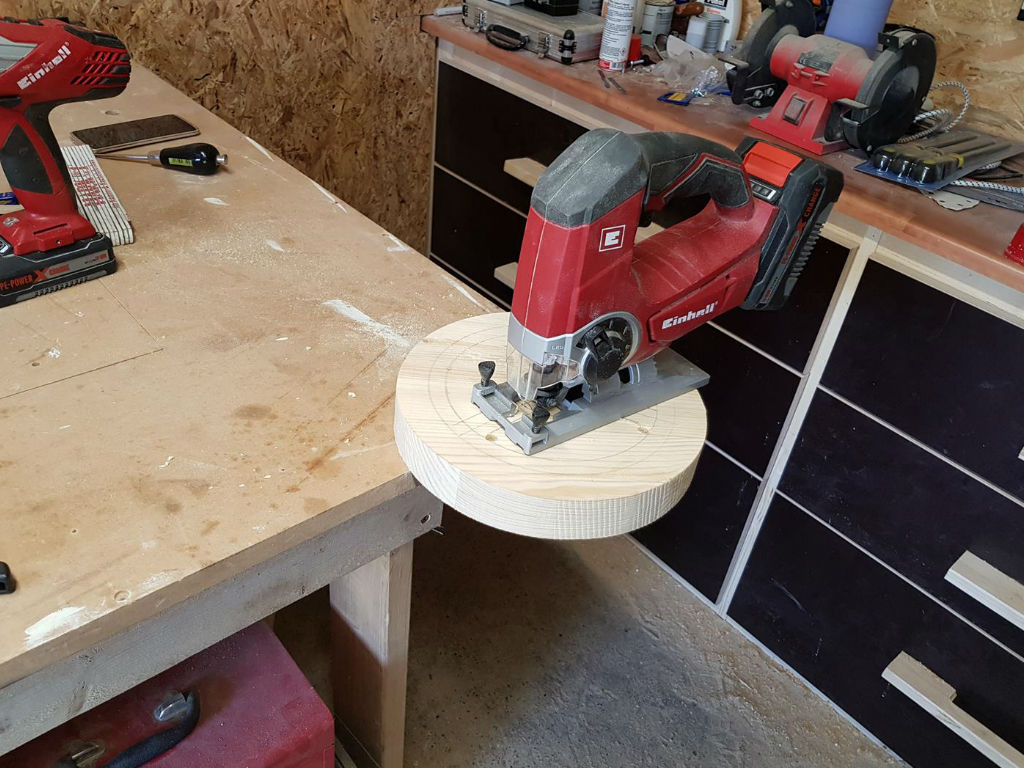
Now pre-drill the inner corners of the wheel with an 8 mm drill and saw out the surface with the jigsaw. Once we have cut out everything, we drill a hole in the middle of the wheel with a 20 mm Forstner-drill. In order to achieve a typical round wheel shape, we round off the corners of the wheel’s tread on both sides with a round milling cutter. Now we can grind the wheel and, if necessary, rework with a rasp.
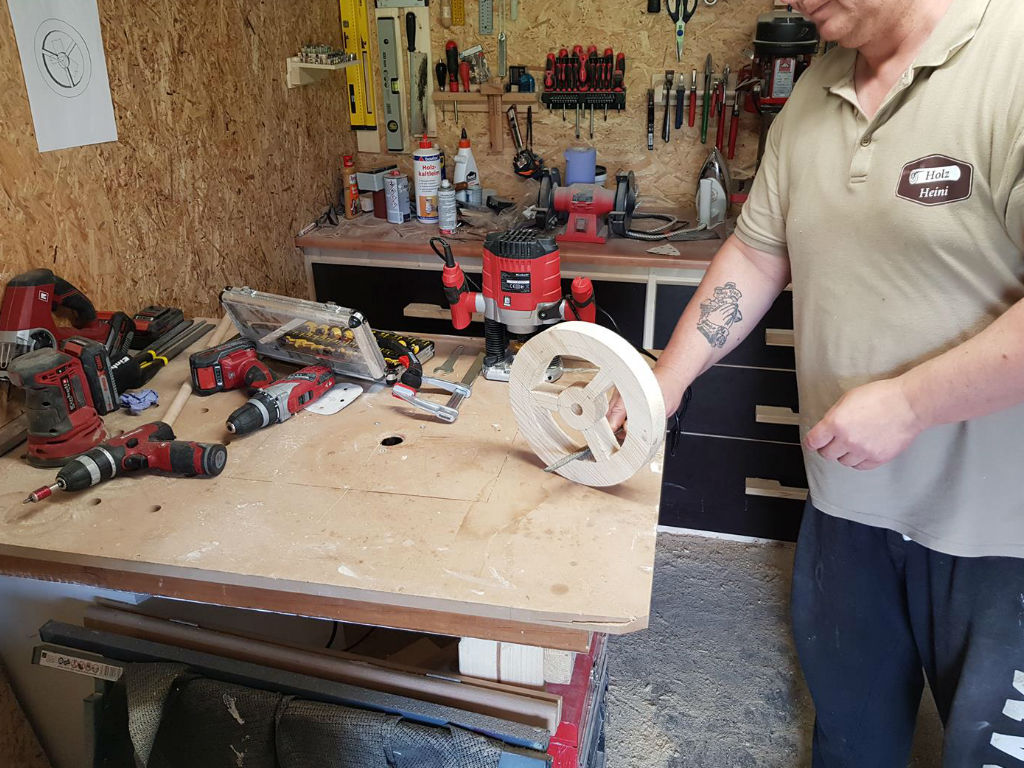
Step 6: Sawing out the frame with handles
The frame of our wheelbarrow enables us to attach the wheel to the main body and can also be used as a handle. Firstly, we take the according boards and mark the curved handles with two nails – just like we did with the side panels. Now we place our flexible strip against the two nails, bend it according to our wishes and secure it with more nails. Alternatively, we can also draw the handles free-handed again.

Now we draw a line along the length and saw along this line with the band saw. To draw the handles for the wheelbarrow with the correct width on the remaining piece of wood, we draw a second line along the edge of the first curve we sew before – either with a marking gauges or using a block and a pencil. This parallel line should be about 4 cm wide. The handles should then also be sawed out with the band saw.
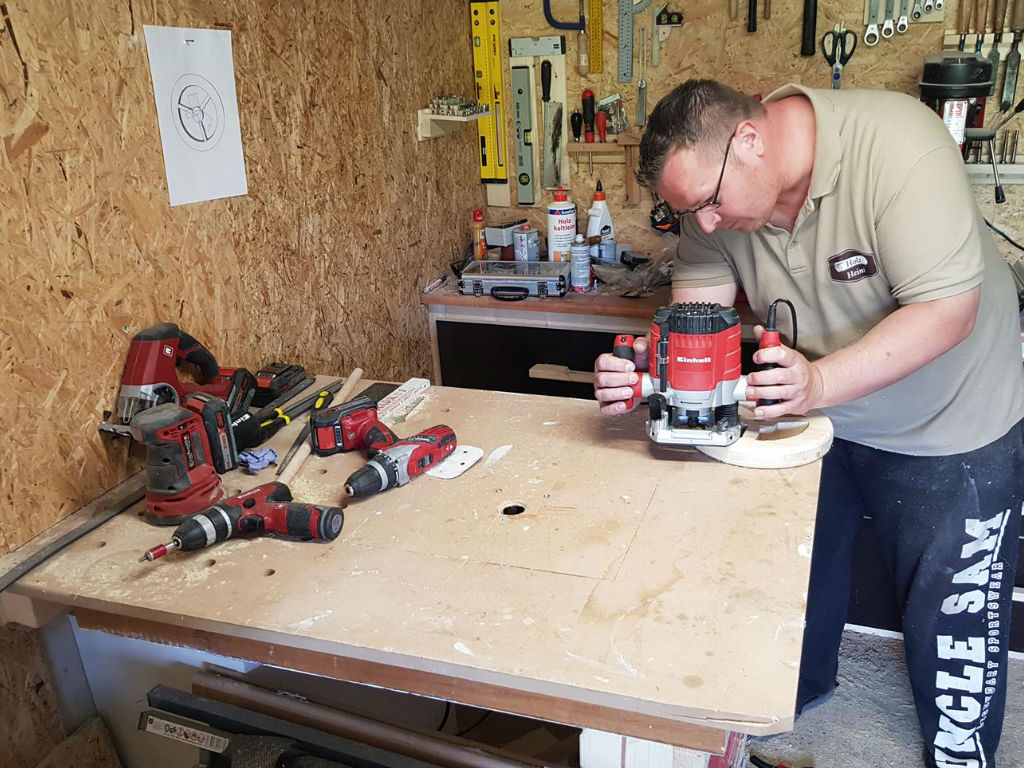
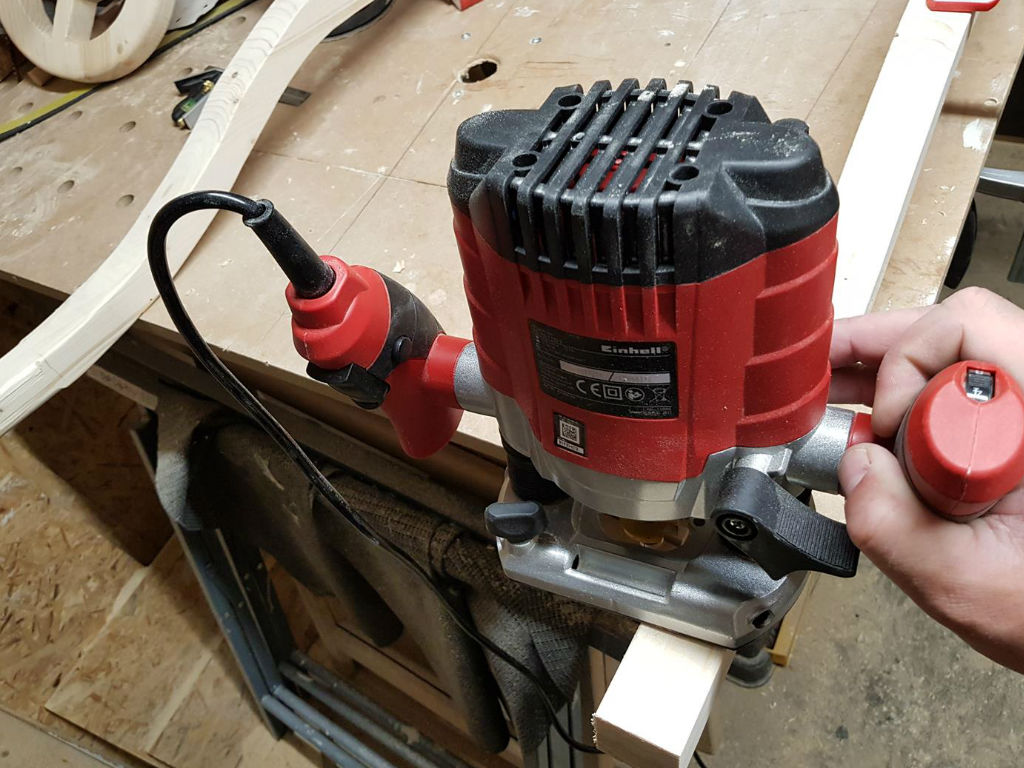
Next, we draw a line all around each handle at about 10 cm from the edge using an angle. This piece can then be rounded with a milling machine. With this method you get a beautiful and practical handle. Finally, before moving on to the assembly everything should be sanded again.
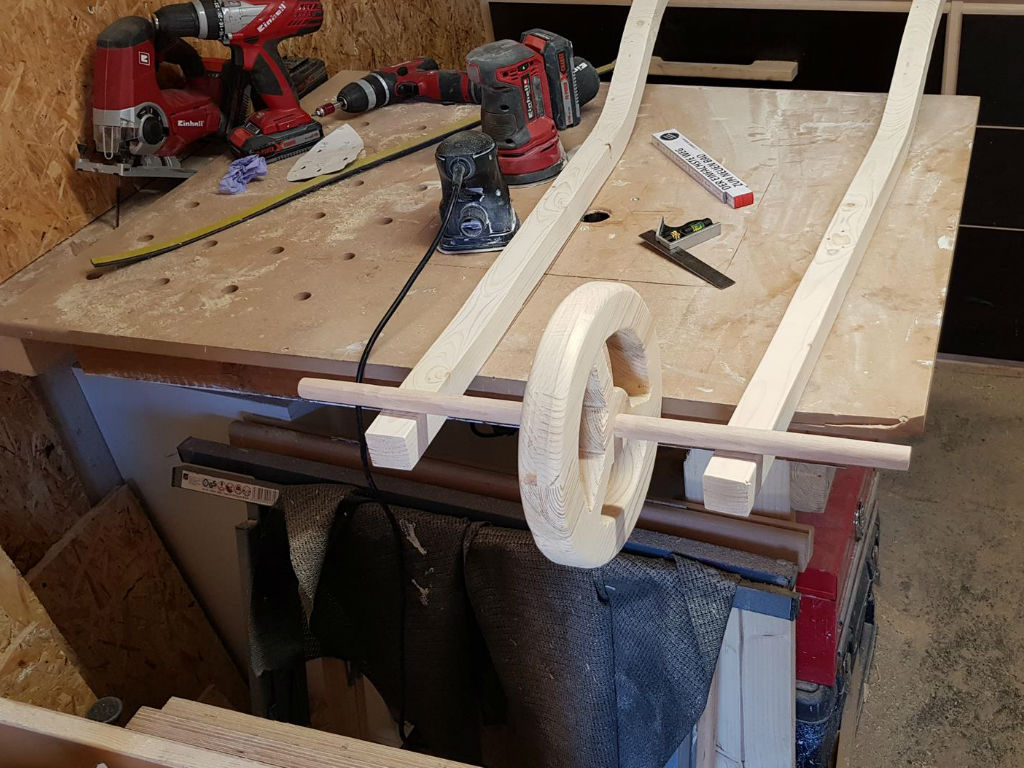
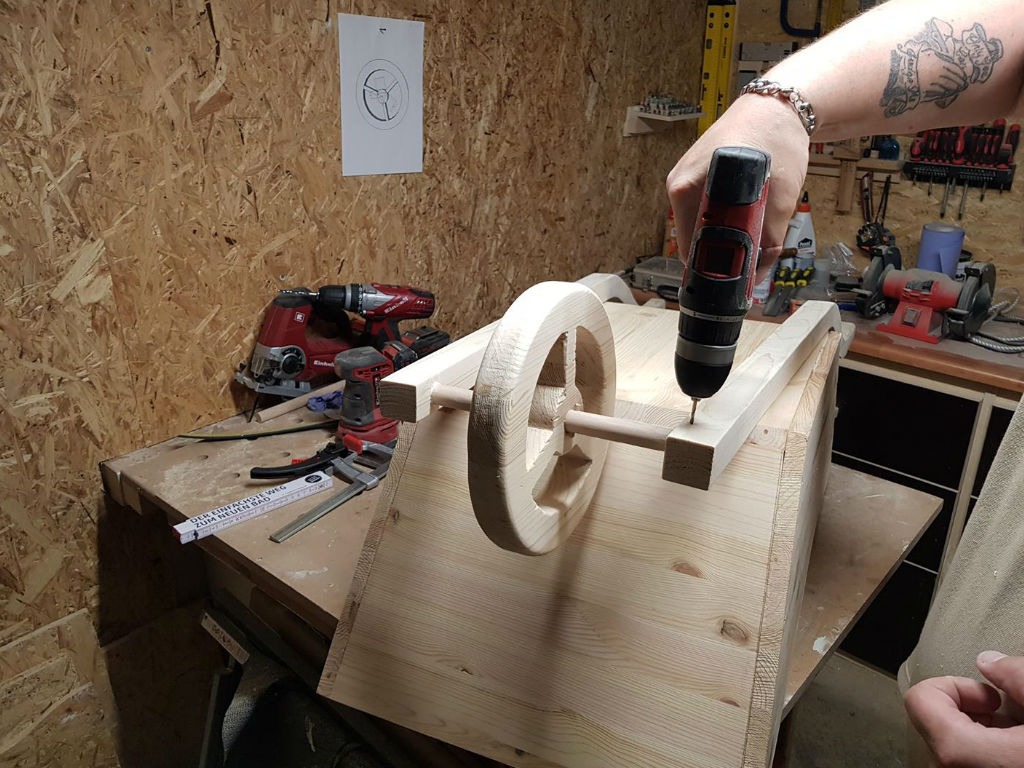
Step 7: Attaching the wheel
We now want to mount the wheel to the framework using an axle made of round wood. Therefore, we place the frame on the workbench and insert the 20 mm round bar through the wheel. To bolt the bar to the handles, we now drill 2 cm deep holes in the inside of the strips. We have to make sure that we drill at a slight angle, so that the handles are later slightly inclined as well.
Then we cut the round rod to 28 cm and push the wheel back onto the bar. When it is placed in the middle, we mark a point on the left and right and drill through the wood at these places with a 6 mm drill. There we put a 6 mm wooden dowel through each borehole, so that the wheel is fixed in the centre and can´t move right or left.
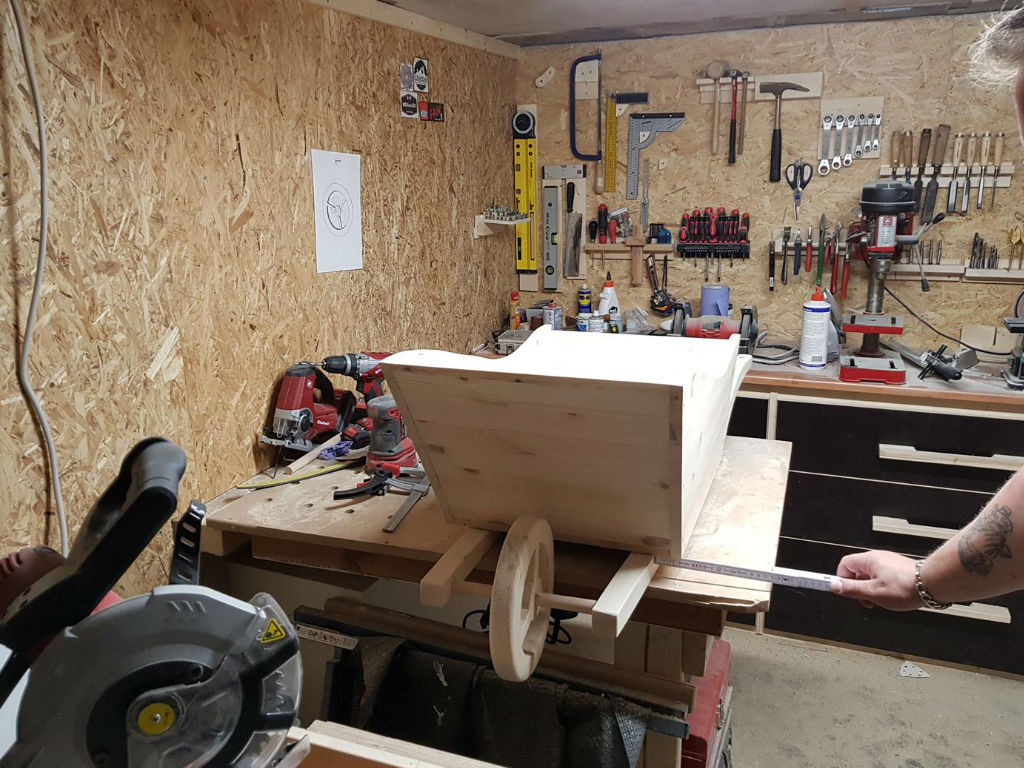
Step 8: The finish
We glue the wheel with the bar to the two side rails and additionally bolt the round bar to the frame with a screw from below. Now, to screw the tub to the scaffold, we place the wheelbarrow on the scaffold and align it so that the distance is the same on both sides. With three screws, the wheelbarrow is now screwed from the inside to the scaffold. To make sure the wheelbarrow has a secure stand in the end, we also cut the supports (15 cm long and 4 * 4 cm wide) and screw and glue the two sides together.
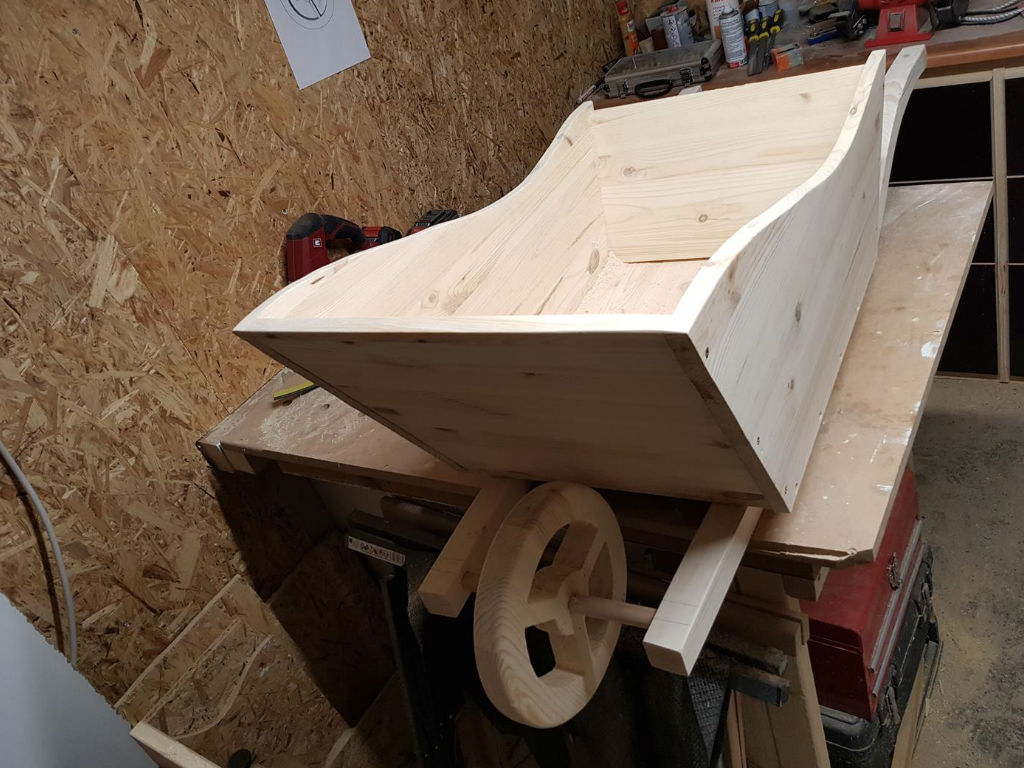
Finally, we paint the wheelbarrow with wood preservation, so it withstands any weather and beautifies your garden from now on. Have fun with your new decorative wheelbarrow!